
Creating a beautiful, functional, and inviting home is the dream of every homeowner. However, even the most well-intentioned design choices can lead to a space that feels chaotic, cramped, or unappealing. At Familyhouse, we believe that avoiding common interior design pitfalls can transform your home into a sanctuary. In this article, we’ll explore 14 interior design mistakes that could ruin your space and share practical tips to help you achieve a cohesive, stylish, and comfortable home.
1. Ignoring the Importance of Scale and Proportion
One of the most common interior design mistakes is choosing furniture or decor that doesn’t fit the scale of the room. A massive sectional sofa in a tiny living room or a dainty coffee table in a sprawling space can throw off the entire aesthetic.
How to Fix It: Measure your space before purchasing furniture. Ensure that each piece complements the room’s dimensions. A good rule of thumb is to leave enough walking space (at least 2-3 feet) around furniture and to choose pieces that feel proportionate to the room’s size.
2. Overloading the Space with Furniture
Filling every inch of a room with furniture can make it feel cluttered and suffocating. While it’s tempting to maximize seating or storage, overcrowding prevents the space from breathing.
How to Fix It: Embrace negative space. Select multifunctional furniture, like an ottoman with storage or a foldable dining table, to maintain functionality without overwhelming the room. Prioritize quality over quantity.
3. Poor Lighting Choices
Lighting is a critical element of interior design, yet it’s often overlooked. Relying solely on overhead lighting or using bulbs with the wrong color temperature can make a room feel stark, uninviting, or even depressing.
How to Fix It: Incorporate a mix of ambient, task, and accent lighting. Use dimmable lights to adjust the mood and choose warm bulbs (2700K-3000K) for cozy spaces like living rooms and bedrooms. Don’t forget natural light—keep windows unobstructed where possible.
4. Following Trends Blindly
While it’s fun to experiment with trendy colors or patterns, designing your entire space around fleeting fads can lead to a dated look in just a few years. Think chevron overload or overly bold geometric wallpapers.
How to Fix It: Use timeless pieces as the foundation of your design and incorporate trends sparingly through accessories like throw pillows, rugs, or artwork. This approach allows you to refresh the space without a complete overhaul.
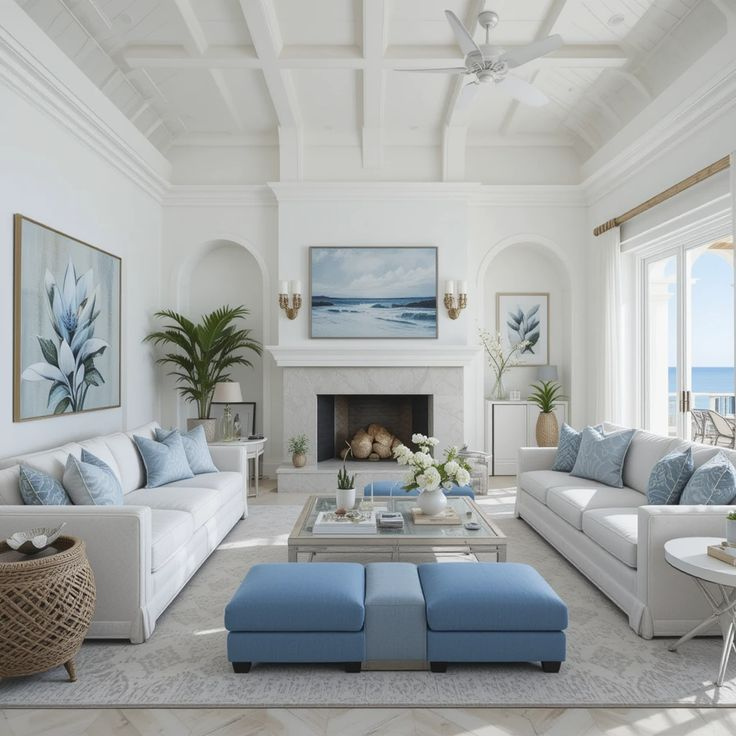
5. Neglecting the Focal Point
Every room needs a focal point—a feature that draws the eye and anchors the design. Without one, a space can feel disjointed or lackluster. Common mistakes include ignoring natural focal points like fireplaces or placing furniture in a way that distracts from them.
How to Fix It: Identify your room’s natural focal point, such as a large window, fireplace, or architectural detail. Arrange furniture to highlight this feature. If a room lacks a focal point, create one with a bold piece of art, a statement rug, or a striking piece of furniture.
6. Clashing Colors and Patterns
A mismatched color palette or overly busy patterns can make a room feel chaotic. Combining too many bold hues or layering clashing patterns without balance overwhelms the senses.
How to Fix It: Stick to a cohesive color palette of 2-3 primary colors and 1-2 accent shades. Use the 60-30-10 rule: 60% dominant color, 30% secondary color, and 10% accent color. When mixing patterns, vary the scale (e.g., pair a large floral print with a small geometric one) and ensure they share a common color.
7. Hanging Artwork Incorrectly
Artwork hung too high, too low, or in the wrong proportion can disrupt the flow of a room. A common mistake is hanging small pieces on large walls, making them look lost, or placing art at an awkward height.
How to Fix It: Hang artwork at eye level, typically 57-60 inches from the floor to the center of the piece. For large walls, opt for oversized art or create a gallery wall with a mix of frame sizes. Ensure the artwork’s scale suits the wall and surrounding furniture.
8. Ignoring Functionality
A beautiful room is useless if it doesn’t serve its intended purpose. For example, a dining room with uncomfortable chairs or a living room with no side tables for drinks can frustrate occupants and guests alike.
How to Fix It: Prioritize comfort and practicality. Test furniture for comfort before buying, and consider how the space will be used. For multipurpose rooms, use modular furniture or zoning techniques (like rugs or lighting) to define different areas.
9. Overdoing the Decor
Too many decorative items—think excessive throw pillows, knickknacks, or wall hangings—can make a space feel cluttered and disorganized. This mistake often stems from a desire to fill every surface.
How to Fix It: Curate your decor thoughtfully. Follow the “less is more” philosophy by selecting a few meaningful pieces that complement the room’s style. Rotate seasonal decor to keep the space fresh without overwhelming it.
10. Choosing the Wrong Rug Size
Rugs that are too small or too large can throw off a room’s balance. A tiny rug in a large living room makes the space feel disjointed, while an oversized rug can overwhelm a small area.
How to Fix It: In living rooms, choose a rug large enough to fit under the front legs of all furniture or fully under the seating area. In dining rooms, ensure the rug extends at least 2 feet beyond the table’s edges to accommodate chairs. Measure carefully before buying.
11. Blocking Natural Light
Heavy curtains, bulky furniture, or poorly placed mirrors can block natural light, making a room feel dark and cramped. This mistake is especially detrimental in small spaces.
How to Fix It: Use sheer or light-filtering curtains to soften light without blocking it. Place mirrors opposite windows to reflect light and make the room feel larger. Avoid placing large furniture in front of windows.
12. Forgetting About Flow
A room’s layout should facilitate easy movement. Furniture arranged in a way that forces awkward navigation or blocks pathways can make a space feel cramped and impractical.
How to Fix It: Plan the layout with traffic flow in mind. Ensure there’s a clear path through the room, ideally 3-4 feet wide for main walkways. Test the arrangement by walking through the space to confirm it feels intuitive.
13. Mismatching Furniture Styles
While eclectic design can be stunning, randomly combining furniture styles without a cohesive theme can make a room feel chaotic. For example, pairing a sleek modern sofa with a heavily ornate antique chair often looks disjointed.
How to Fix It: Choose a primary style (e.g., modern, traditional, or bohemian) and use it as the foundation. Introduce complementary styles through smaller pieces or accessories, ensuring they share common elements like color, texture, or material.
14. Skipping the Personal Touch
A home should reflect its occupants’ personalities, but many people create sterile, showroom-like spaces by relying solely on store-bought decor. This mistake results in a space that feels cold and uninviting.
How to Fix It: Incorporate personal items like family photos, heirlooms, or handmade crafts. Display travel souvenirs or artwork that resonates with you. These touches make the space feel uniquely yours and add warmth.
Final Thoughts
Avoiding these 14 interior design mistakes can elevate your home from chaotic to cohesive, from cluttered to calm. At Familyhouse, we’re passionate about helping you create spaces that are both beautiful and functional. By prioritizing scale, lighting, functionality, and personal touches, you can design a home that reflects your style and meets your needs. Take your time, plan carefully, and don’t be afraid to experiment—your perfect space is within reach!
Author
Familyhouse Cuisine
Familyhouse Cuisine is dedicated to inspiring homeowners with practical and creative ideas for transforming their living spaces. From interior design tips to home organization solutions, we’re here to help you make your house a home.
Keywords
interior design mistakes, home decor tips, Familyhouse, avoid design pitfalls, cohesive home design
Leave a Reply